 Home |
|
Index Stuff Other Tools Forms Rebuilding Taper info |
| No matter if you get your block plane from a "Home Improvement" superstore, a catalog, a hardware store or the local flea market There's one thing you'll have to do -- flatten the sole. Make up your mind that, like everything else to do with bamboo rod building, it's going to take a little time. This is where the "zen" of rod building comes in. You have plenty of time to meditate. |
|
You're trying to do two things. First, flatten the sole. Then, smooth the flattened sole. A few words about the difference between flat and smooth. Something is flat if it doesn't have any contours in it. Two examples of flat are, a mesa in the southwest, or a billiard table with new felt. Both can be viewed as "flat" but not "smooth." On the other hand, something that is smooth has no major deviations around any given point. The old saying, "smooth as a baby's bottom." comes to mind. A baby's bottom can be smooth, but it sure isn't flat. |
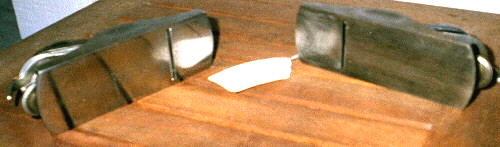
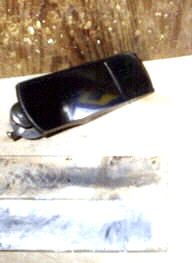
 the Top plane is smooth The bottom plane is flat |
| Flat is the most important. How far you take the second is
really up to you. It's fun to polish the sole, and might
impress your friends, but the only real reason to polish it is to
make it pass more easily over the bamboo.
We'll look at problems usually associated with used block planes later. Right now let's look at what you want and what you probably have when you start out. |
 |
 |
| The plane on the left has a flat surface. The plane on the right looks flat when you fist pick it up but after rubbing it across a piece of wet -n- dry (on a flat surface) you'll see that the center isn't being touched by the abrasive. 0This happens because the plane was milled "flat" while held in a machine. The machine actually may have caused the center of the sole to bow out less then a thousandth of an inch. When the pressure was taken off the sides the sole returned to normal. What had been milled flat became concave. |
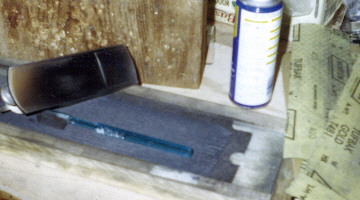 I bought a piece of
18" x 6" x 1/8" glass at the local home improvement shop. To
support it I bought a piece of 1 x 8 pine a little longer than the
glass. To hold it in place I bought a 1/2 x 3/4 strip
of molding. I planed the wood flat (you do own a
plane, you might as well use it.) then put a strip of the molding
along one side and one end. I placed the glass against the
side and the end and then put a third wood strip down the other
side to hold everything in place. I didn't put anything
across the other end so I'd be able to get the back of a blade
flat on the glass. I cut a strip of course wet
-n- dry to fit and sprayed the back of it with spray-on
adhesive. Then I very carefully placed it on the glass. I bought a piece of
18" x 6" x 1/8" glass at the local home improvement shop. To
support it I bought a piece of 1 x 8 pine a little longer than the
glass. To hold it in place I bought a 1/2 x 3/4 strip
of molding. I planed the wood flat (you do own a
plane, you might as well use it.) then put a strip of the molding
along one side and one end. I placed the glass against the
side and the end and then put a third wood strip down the other
side to hold everything in place. I didn't put anything
across the other end so I'd be able to get the back of a blade
flat on the glass. I cut a strip of course wet
-n- dry to fit and sprayed the back of it with spray-on
adhesive. Then I very carefully placed it on the glass.
If I ever build another one I'd use a piece of 3/4 plywood for the backing rather then the pine I have now. |
 I
start with very course wet -n- dry sandpaper (about 100
grit!). I start with a lot of downward Pressure. After
I see that I'm starting to get results I ease up. I have a
set of movements that I follow. I move the plane
clockwise for about 100 strokes, then counter-clockwise for the
same number. After this I move the plane left to right, then
forward and backward always counting to keep things more or less
even. After a cycle I reverse the direction of the plane and
repeat. Each time I change the type of movement I get a new
scratch pattern on the sole. It makes it easy to see what
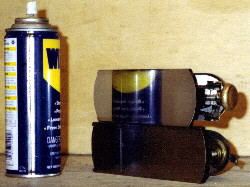
I'm doing. Every so of often I spray the sole with WD-40
then wipe it dry with a paper towel. I also use a tooth
brush to clean the sandpaper. (I pick up the iron dust with
a shop vac.) I
start with very course wet -n- dry sandpaper (about 100
grit!). I start with a lot of downward Pressure. After
I see that I'm starting to get results I ease up. I have a
set of movements that I follow. I move the plane
clockwise for about 100 strokes, then counter-clockwise for the
same number. After this I move the plane left to right, then
forward and backward always counting to keep things more or less
even. After a cycle I reverse the direction of the plane and
repeat. Each time I change the type of movement I get a new
scratch pattern on the sole. It makes it easy to see what
I'm doing. Every so of often I spray the sole with WD-40
then wipe it dry with a paper towel. I also use a tooth
brush to clean the sandpaper. (I pick up the iron dust with
a shop vac.) |
 |
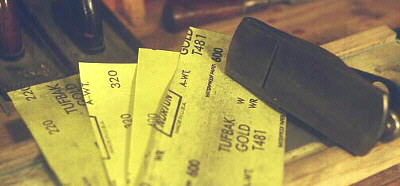
After I've gotten to the 99% mark, (the sandpaper is touching
99% of the sole. I tried stopping at about 95% once. I
found it took longer with the finer grits.) I'll go to finer
sandpaper. At this point the job gets a lot easier. I have
wet -n- dry in grits from 86 to 2000. I go through all my
different grits until I've come to the finest. At this
point, because I'm a little nuts, I polish the plane sole on a
piece of 2 in. masking tape I've taped to some scrap
Plexiglas. I put polishing compound on the tape and have a
go at it. By this time I should be able to see my face in
the surface of the plan.
To finish, I rub candle wax over the sole then buff with a cloth. (If you were ever in the military you'll remember spit shining boots. That's about what this is.) the wax will seal the sole from moisture, of which I have a lot, here in Florida. I always put a little wax on a sole after using it. |
| Home |
Index
Stuff you need Forms Planes |